Dust Control
Season 17 Episode 1706 | 26m 46sVideo has Closed Captions
On this episode, the Woodsmith team builds a roll-around air cleaner.
An often-overlooked aspect of a great shop is dust control. On this episode, the Woodsmith team builds a roll-around air cleaner. With an adjustable fan and a large filter, this project is designed to clear the air in your shop.
Problems with Closed Captions? Closed Captioning Feedback
Problems with Closed Captions? Closed Captioning Feedback
Woodsmith Shop is a local public television program presented by Iowa PBS
Dust Control
Season 17 Episode 1706 | 26m 46sVideo has Closed Captions
An often-overlooked aspect of a great shop is dust control. On this episode, the Woodsmith team builds a roll-around air cleaner. With an adjustable fan and a large filter, this project is designed to clear the air in your shop.
Problems with Closed Captions? Closed Captioning Feedback
How to Watch Woodsmith Shop
Woodsmith Shop is available to stream on pbs.org and the free PBS App, available on iPhone, Apple TV, Android TV, Android smartphones, Amazon Fire TV, Amazon Fire Tablet, Roku, Samsung Smart TV, and Vizio.
Providing Support for PBS.org
Learn Moreabout PBS online sponsorship[ Whirring ] ♪♪ It's real easy to get distracted by the projects that we build in our workshops and the tools that we're going to use.
So on today's episode of "The Woodsmith Shop," we're going to turn our attention to shop safety, specifically the air we breathe.
And we're going to build a shop-built air cleaner.
It goes together pretty quickly, and it's a great way to improve both the cleanliness and safety of your workshop.
Announcer: Major funding for "The Woodsmith Shop" has been provided by... Announcer: Old Masters, offering wood stains and finishes for the woodworking enthusiast and professional.
Announcer: ...and by... Announcer: Kreg -- from the first cut to the final assembly, providing woodworkers with products that help to simplify woodworking challenges.
Kreg.
Announcer: Additional funding provided by... Announcer: Titebond wood glues, the pro's advantage.
Announcer: ...and by... ♪♪ ♪♪ ♪♪ ♪♪ The power-tool woodworking is a lot of fun, and it's a very efficient way to work.
The dark side of it is, it produces a lot of dust, and some of that dust is harmful.
The harmful range of dust is between about 1 and 3 microns, a micron being a 10/1000 of an inch.
And that can really affect our health.
So dust collection and woodworking have to work in tandem.
When we have a process that produces an irritant like sawdust, there are really four things we can do to deal with it.
One is, we can think about how to not produce the sawdust to begin with.
And that may sound a little simplistic, but it is important.
We can always take our project out in the driveway.
We can choose not to cut up a lot of MDF.
We can think about how we're working and work smarter to not produce the sawdust and not produce the problem.
The second thing we need to think about is point control, where we're actually going to take the dust and capture it as it's being produced.
Next, we have to think about our environment and how we're going to help clean the air and clean the surroundings.
And, finally, we think about PPE, personal protective equipment.
So those are the four steps.
So, let's go ahead and take a look at our second step, which is point of control.
And we're going to begin by looking at vacuum cleaners.
A vacuum cleaner is one of the best tools you can buy to help tame the dust problem in your shop.
Now, one of the great things about a vacuum cleaner is the airflow.
There's not a lot of volume, but it is a fast velocity, and that is fantastic for portable power tools, like this random orbital sander or a miter saw or the dust control on a handheld router.
Those all require fast air, but not a lot of it.
So these are the tools we need.
Now, there are really two kinds of vacuum cleaners here, the classic Shop-Vac and a more advanced vacuum cleaner that is typically called a dust extractor.
Now, what's the difference?
The dust extractor is going to have a better filter and it typically has a relay and a plug so that it automatically turns on when you start to use your tool.
And that's awful handy, because you know what?
If we don't turn these on, they don't work very well.
Aside from that, let's take a look at the filter, because the filter is so important with how these tools work.
So, this little Shop-Vac has your standard circular pleated filter.
It's a paper filter.
It needs to be cleaned regularly or it's not going to work very well.
This dust extractor, as you can see, has a different design of filter.
This filter hangs in this position, and the dust that builds up in it tends to fall out and help keep the plates clean.
But we need to make sure that we keep the filters clean in both machines, and how can we help with that?
One thing we can do is add to your dust extractor or your Shop-Vac a small, mini cyclone, which you've probably seen advertised in all the woodworking magazines.
A little cyclone like this is not going to turbocharge your vacuum cleaner.
It's not going to turn it into a dust collector.
But what it will do is help prevent some of the dust from reaching the filter, and that's super-important.
Vacuum cleaners, whether it's a Shop-Vac or a dust extractor, it's a fantastic place to start with your dust collection.
You may want to think about adding a mini cyclone to protect that filter.
So, now let's go over and look at dust collectors.
Well, remember when we talked about vacuum cleaners, we had low volume of air, but it moved fast.
Well, with dust collectors, it's the opposite.
A lot of volume, but a little bit slower speed.
Well, that makes it a great companion to the vacuum cleaner, and what it really excels at is those big tools in your shop, like the planer, the joiner, the table saw, where you just need lots and lots and lots of air movement.
That's what a dust collector is going to supply for you.
Now, there are a couple kinds of dust collectors.
There's single-stage and there's two-stage.
So, let's take a look at single-stage dust collectors.
This is a good example of a single-stage, and it just has a blower.
The air comes in.
We have a filter bag here.
The sawdust drops into our lower bag.
One thing that it won't do is, it's not going to give us the filtration of the dust that we probably would like, because this thin bag -- it's not going to take care of the really fine particles, that 1-to-3-micron range that we need to get rid of.
So a good upgrade for a single-stage dust collector is this one, which has this big pleated filter on it.
That will take care of that fine dust.
Now, single-stage, two-stage.
Let's take a look at the two-stage.
All that means is that we have a cyclonic separator here.
If you remember the little, mini separator we talked about with the vacuum cleaners, well, here's its big brother.
So, it's going to separate out a lot of the dust and it's going to protect the filter.
So there's the same theme.
We want that filter to stay as clean as possible and protect it.
The dust is going to fall into this bin.
Our filter is hidden back here behind the sheet metal.
And the dust simply drops into a canister below it.
So it's a system in which it separates the dust out and keeps the filter clean.
Well, we know, with vacuum cleaners and dust collectors, we're going to get most of the dust in our shop cleaned up right at the point of origin, but we're not going to get all of it.
For that, we need more of an environmental control.
For the air, there are two types of air filters or air scrubbers.
One is an overhead, which hangs from the ceiling, and it's a big box-like contraption.
You can also place those directly against a wall, as well.
And what you want to do is set up a circulation pattern where the air is constantly being run through the air filter and cleaned.
Another type of filter is like this, a vertical mobile filter, which you bring right to your bench, right to the place where you're creating the dust.
And it really works great.
This is a fantastic project on today's show, and it's really going to help you in your shop.
Personal protective equipment means a good mask, that you're not breathing any residual dust.
Masks come in a lot of different shapes, a lot of different sizes.
I have two examples here.
This is a simple N95 mask.
You get a couple of wearings out of it.
It has an exhalation valve, which is great if you wear glasses.
It makes it a lot more comfortable to wear, too.
Here's your classic industrial silicone-rubber half-face respirator with replaceable cartridges.
This is actually my favorite.
A lot of people hate these things 'cause they're kind of bulky, but why I like these is because I always get a good seal of the mask to my face.
And no matter what mask you get, whether it's this one, this, or anything in between, if it doesn't fit properly and it leaks, it's not going to be effective.
So, we've gone over four different ways that you can control dust in your shop -- try and not generate it or move it outside, point collection using vacuums or dust collectors, environmental control, using air filters, and finally, PPE.
So, try to integrate all four into your shop, and you can be healthy and really enjoy your woodworking hobby.
All woodworkers are in a constant battle with dust, trying to keep our shops clean and healthy.
Well, today on "The Woodsmith Shop," we've got a great project for you.
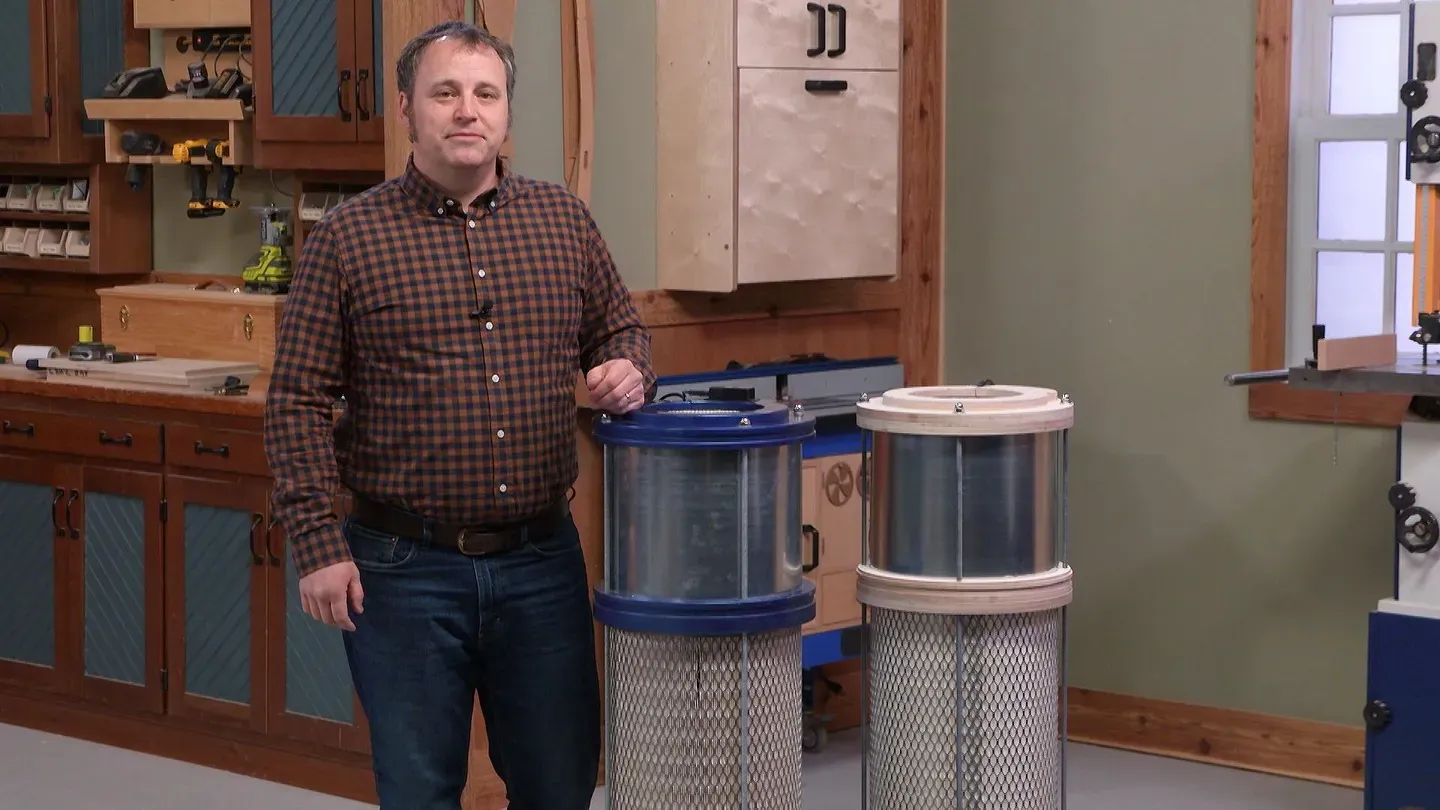
It's this air filter.
This is a powerful filter with a strong motor, and it's quiet.
And it features an industrial-grade cartridge to filter that air down to 98% pure of the particles which can cause health problems.
And it's a pretty easy project to build.
It's a series of plywood rings, some all-thread, and it clamps our cartridge and our fan together.
It looks sharp, it's easy to build, and it's going to help you keep your shop clean.
And you'll find the plans for it on the TheWoodsmithShop.com.
Now, as impressive as our air cleaner is going to look when we're all done with it, the surprising part of it is that, in terms of woodworking, it's pretty simple.
We're going to make a lot of circles out of plywood.
But before we get to the circle, we're starting with a number of squares.
I'm going to run through the process of showing two of the disks, or circles, that we're going to need on how you're going to make them.
And then Logan is going to pick up the process on assembling them all together into the air cleaner.
So, let's get started here.
I have a blank for one of the circles.
There's going to be six of these in this size.
So you want to get some blanks put together.
And then the first thing that we'll do is to find the center point.
So, that's just using a ruler, going from corner to corner, and drawing lines to find that center point.
Then I take an awl and I mark that center point, because we're going to use that for shaping a little bit later down the road here.
Next up for the layout is to use a compass to describe not only the outside final diameter of each of the circles, but then also to reset the compass and use it for several of the other intermediate rings.
Like, for example, the whole air cleaner is held together with long pieces of threaded rod.
So I'm going to mark the locations for the holes for that threaded rod to pass through -- four pieces of threaded rod -- and we can mark them right on our diagonal layout lines here.
So, now once you have all of the marks laid out, then we can grab a drill and drill out the center... because we're going to use that for a pivot pin with our router setup that I'm going to get to in just a second.
Now, I am going to use a router to make all of these circles, and I want to protect the bench top, because I've put enough damage on this surface anyway.
So I have a piece of MDF that I've secured in the vise, and we're going to stick our blank to that backer with some double-sided tape.
Using double-sided tape really works well here, because now there's no clamps in the way so that when we start routing, we don't have to stop the process at all.
So, let's talk about how we are going to do that routing.
I'm going to use a plunge router, because we're working through 3/4-inch-thick plywood, and I don't want to try and route through that entire thickness in one pass.
Puts a lot of stress on both the bit and the router.
Instead, we're going to step our way down, and that's really easy to do with a plunge router.
To control the motion of the router, I've made a trammel jig that, at its heart, is a long aluminum ruler that's attached to a router base and then has, down here, a sliding center point.
So I can loosen the knobs on this.
And what I'll do is drop this pin on the center point, into the center hole.
Now I can take the router bit... and line that up with my layout line.
And then lock it down.
And I'm ready to get started routing.
Now, the process is simple.
I'll turn on the router, plunge it down about 1/4 of an inch, and then route around the entire edge.
Got to keep an eye on the power cord here and loop that around as you keep going.
Once you get to the starting point again, lower the bit a little bit more, work your way down.
Probably three or four passes, and you'll get to the end and will have the complete circle.
Alright, here's what it looks like.
Got the circle completely cut out of our square plywood blank.
And looks pretty good.
The router does a great job of making those cuts smoothly and easily.
Now, like I said, there's going to be several disks that you'll need to make of this size, but I want to move on to the bottom of our air cleaner, because that has a little bit more going on and a little bit different procedures that you'll use in order to bring it to shape.
The last part that I want to show making, because all the rest of them are just disks, is the bottom piece for the air cleaner.
And what's different here is that it has four ears on the edges, and that's going to hold casters and give the air cleaner a nice, stable stance so that when you roll it around the shop, it's not going to tip over on you.
It kind of complicates the layout and the shaping a little bit, but there are easy ways to get around that.
First of all, I started off the exact same way.
I drew my crosslines, have a center point, and I marked in the inner radius of the piece.
And then I went around at the outside radius of those ears and marked those with a compass, as well.
The transition between the ears and that inner curve is a nice, smooth radius.
Rather than try and do that at the band saw or with a jigsaw, I headed over to the drill press and marked and drilled out all eight of those transition pieces with a nice big 2-inch Forstner bit.
It goes pretty quick, and that means it's going to be a lot easier to get a nice, smooth transition on those parts.
Now we're ready to do some shaping.
And I've set up my router and the trammel for the outer edges of the ears.
Now, you could just trace it around in one big circle, but that's a lot of extra wear and tear on the bit and the router.
So what I'm going to do is just route little sections right along where those ears are going to be, working my way down to cut it out.
Then I'll readjust the trammel and do the same thing, but this time, kind of like a dot-to-dot, where I can go from these transition holes one after another and shape this piece, and then we'll finish it up once we're done.
I'm here at the band saw to finish shaping the ears on this piece.
I've already gone ahead and kind of lopped off the corners to make it easier to be able to line up the blade with these layout lines.
It's just a matter of making a cut on each side.
I'm going to stay just outside those lines and then finish cleaning those up over at the workbench.
I used some files and some sandpaper to ease the transition from those tabs over into the round sections of the base here.
Then I also used the file to create little round-overs, a radius, just to make sure that that's not a sharp edge that's going to catch somebody's ankle once you start moving this around.
So, after giving this a nice sanding, you can take your piles of wheels, and I'm going to hand them off to Logan and he can assemble them into our air cleaner.
So, now that Phil has all of the parts cut for our air cleaner, we want to start assembling them.
There are a couple of parts that I did stop over at the router table and route a rabbet on.
That's going to be this disk and this guy here.
And that's going to be for some strapping if you want to hang this thing on the wall instead of having it roll around.
So, now we can go ahead and assemble it.
Basically, what we're doing here is making a plywood sandwich.
So, I'm going to use these shorter little bolts just to help with registration on everything, help keep the parts aligned.
There we go.
And now we're going to start stacking.
What I'm going to do is, I'm going to add a layer of glue, put the part in place, and then just use some pin nails to hold everything together.
So, I'll glue this ring onto that lower disk, and then we'll go ahead and glue both of those and screw them to this lower plate.
Now, the lower plate has these wings on it for casters.
We'll add those at the end so it's not rolling around as we're trying to assemble everything.
So, the next couple layers, like the bottom, get glued together.
So I'm going to add those layers, leave a little bit of a gap, get some glue in there, and apply clamps to hold everything tight, and then pin-nail it together again.
So, that's it for those layers for now.
I'm going to go grab the motor and get this on the ground, and we'll talk about installing that.
So, the motor for our air cleaner is simply one of these inline duct motors.
They're designed for HVAC systems to help boost the air.
And this is sized to fit right in those rings, and it'll just hold itself in place.
Now, the one thing you do want to pay attention to is the direction of airflow.
You can install it either way, where it's sucking air in from the top and blowing it down and out, or it's blowing up, so it's sucking air in, and then the exhaust is up.
Really, the only thing that's going to change is where the dust is collected on your filter, whether it's collected on the outside or the inside.
For us here, I think we want that dust on the outside so we can easily vacuum and blow that filter off as it gets clogged up.
So I've simply went ahead and looked at the airflow arrows, make sure that air is going to flow up and out, and that's how I've set it in place.
We'll go ahead and stick those cords on the inside for now.
So, now we're going to install this steel shroud.
And this is a piece of steel that I simply screwed together where it overlaps.
That's just going to hold that joint down.
And this sits in that groove that's in that disk.
It's a little tricky to fish it in, but once you get it started, you can kind of work it in all the way around.
There we go.
And then we're going to add this disk.
Now, you do want to position this disk so that the hole for the cords is in the same position as the cords coming out of the electrical box on the motor.
So right in there.
And now this is kind of a dancing game on getting those threaded rods to start getting the motor to fit in the hole and for that steel shroud to fit into the groove.
There we go.
Now, once that disk is added, same story as before.
We're going to keep adding disks.
So we'll position those, glue them, and pin-nail them in place.
And then the final disk is going to be this guy.
And this is going to trap some -- Fiber mesh up top to help keep people's hands from going in there.
And to fit the cords through this little hole, I'm going to cut a kerf with a handsaw.
That'll just allow me to kind of split this entire thing apart, slip those in place, and once it's all painted, you won't notice it.
Alright, with the casters installed, there's no reason we can't flip this right side up and give her a try.
[ Whooshing ] There we go.
It's working really nicely.
So, now all that's left to do is strip this back down, add some paint, and reassemble it.
The big advantage of building an air cleaner like the one we made in today's episode is having cleaner air and a safer condition to work in your workshop.
However, there's another benefit, and that's keeping your space cleaner.
It's going to make the time you spend in your workshop even more enjoyable.
And if you'd like to make one of these yourself, the plans are at our website, WoodsmithShop.com.
So once you've upgraded your workshop, we can get started on another episode and another great project right here in the Woodsmith shop.
Phil: If you'd like to get more video tips and techniques, sign up for the free weekly Woodsmith eTip.
Every week you'll receive an e-mail with a video tip to get more out of your table saw, router table, and more.
Sign up at WoodsmithShop.com.
Everything in today's show comes from the newly expanded Woodsmith Guild Edition with shop projects, plans, tips, and techniques.
To get a free preview issue of The Woodsmith Guild Edition and a free Woodsmith book, go to WoodsmithShop.com.
In addition, past seasons of "The Woodsmith Shop" are available on DVD, or you can watch them online from your computer, tablet, or mobile device.
For more information, go to WoodsmithShop.com.
Announcer: Major funding for "The Woodsmith Shop" has been provided by... Announcer: Old Masters, offering wood stains and finishes for the woodworking enthusiast and professional.
Announcer: ...and by... Announcer: Kreg -- from the first cut to the final assembly, providing woodworkers with products that help to simplify woodworking challenges.
Kreg.
Announcer: Additional funding provided by... Announcer: Titebond wood glues, the pro's advantage.
Announcer: ...and by... ♪♪ ♪♪


Support for PBS provided by:
Woodsmith Shop is a local public television program presented by Iowa PBS